Some days just call for a soft, caramel topped cookie that feels like a little treat after a long day. These Crumbl Copycat Twix Cookies were inspired by a bakery cookie that I could not stop thinking about, and I was determined to bring that same bite into my own kitchen.

This post contains affiliate links. As an Amazon Affiliate, if you purchase through those links, I earn a small commission. Thank you! See Disclosure.
After a few rounds of testing, this version became the one my family requests again and again. The base is a tender vanilla cookie with tiny bits of toffee, then a silky caramel layer and a smooth blanket of chocolate on top. It tastes like a Twix bar in cookie form, only thicker and softer.
A Cookie For Cozy Evenings
Cooler evenings, warm drinks on the table, and a tray of these Twix cookies setting up on the counter create the kind of moment everyone lingers for. You can smell the butter and caramel as they cool, and the first bite gives you that mix of soft cookie, stretchy caramel, and just set chocolate that feels pleasantly indulgent after dinner or during a movie night.
Ingredients
For the cookies
- unsalted butter, softened
- sugar
- brown sugar
- oil
- egg
- vanilla
- flour
- baking powder
- salt
- corn starch
- toffee pieces
For the topping
- caramel candies, unwrapped
- heavy cream
- chocolate chips, melted

How To Make Crumbl Copycat Twix Cookies
Start by heating the oven to 350°F (175°C) and lining two baking sheets with parchment. I like using heavier baking sheets because they conduct heat more evenly and help the cookies bake without dark bottoms. The parchment keeps cleanup easy and makes it simple to slide the cookies off the pan once they are set.
While the oven preheats, make the caramel layer. Add the caramel candies and heavy cream to a medium microwave safe bowl, which is perfect here since you can both melt and stir in the same dish. Warm the mixture in 30 second bursts, stirring in between, until the caramel looks completely smooth and creamy. Set it aside at room temperature while you make and bake the cookies, which helps it thicken slightly so it sits nicely on top later.

Next, prepare the cookie dough. In the bowl of a stand mixer fitted with the paddle, or in a large mixing bowl with a hand mixer, cream together the softened butter, sugar, and brown sugar until the mixture looks lighter and fluffy. I rely on a stand mixer here because it adds air to the dough and saves my arms, but a hand mixer works very well too. Scrape down the sides of the bowl to catch any butter hiding along the edges.

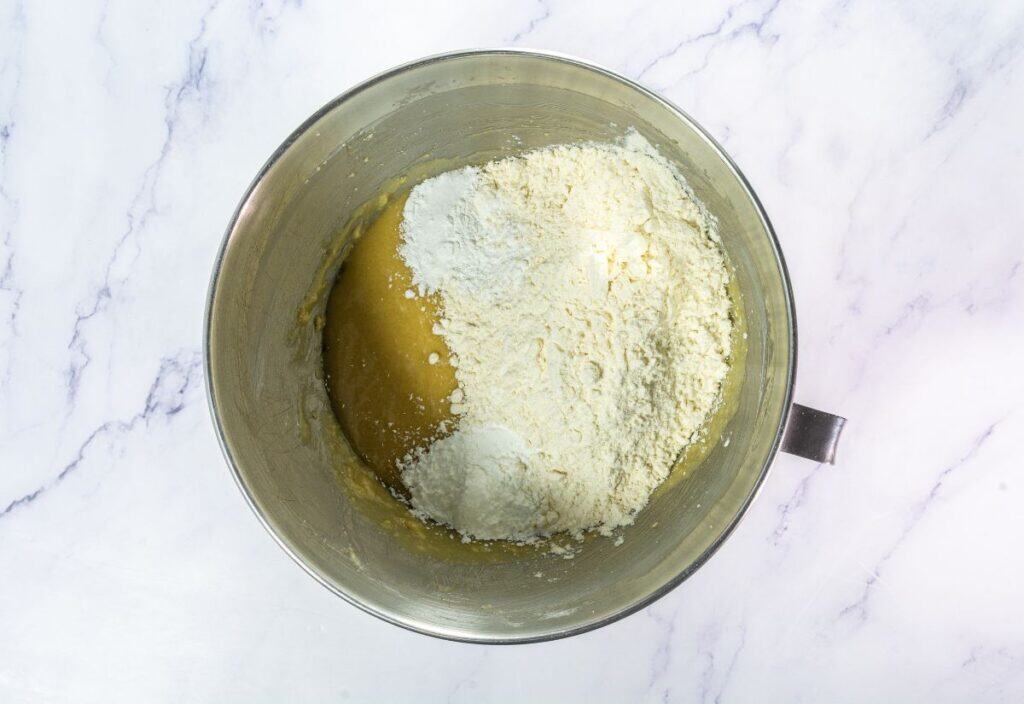
Add the oil, egg, and vanilla to the bowl and mix again until smooth and glossy. Scraping the bowl a second time helps keep the dough even and prevents streaks of egg or oil. When the mixture looks fully combined, you are ready for the dry ingredients.

Sprinkle in the flour, corn starch, salt, and baking powder. Mix on low at first so the flour does not puff out of the bowl, then increase the speed just until everything comes together. Corn starch keeps the cookie base tender, and mixing only until the flour disappears prevents a tough texture. If you see dry pockets in the corners, use a rubber spatula to gently fold them in; a rubber spatula gives you more control and helps you reach the bottom of the bowl.
Fold in the toffee pieces with the same rubber spatula, turning the dough from the bottom up. Toffee can cluster together, so breaking up any clumps with the edge of the spatula helps distribute the bits through every cookie. The dough will be fairly thick and slightly glossy from the oil.


Use a large ice cream scoop to portion the dough onto the prepared baking sheets, spacing the mounds several inches apart. I like a trigger style scoop because it keeps the cookies a consistent size, which means they bake at the same rate. Once scooped, take the bottom of a glass cup or measuring cup and gently press each mound into a disc about ½ inch thick. A flat, sturdy glass makes this easy and gives you a neat edge for layering the caramel and chocolate later.


Bake the cookies in the preheated oven for 10 to 12 minutes, just until the edges are barely beginning to turn golden and the centers look set but still soft. The cookies will continue to firm up as they cool, so pulling them before they brown deeply keeps them tender. Allow the cookies to cool completely on the baking sheet before you assemble, since warm cookies would melt the toppings too much.

While the cookies cool, melt the chocolate. Place the chocolate chips in another medium microwave safe bowl and heat in 30 second intervals, stirring in between, until smooth. A shallow bowl helps the chocolate cool faster and makes it easier to scoop when you are ready to spread it on top. Let the melted chocolate sit at room temperature until it thickens slightly; this gives you a glossy top that sets nicely.

To assemble the cookies, place the cooled cookie bases on a cooling rack set over a sheet of parchment. The cooling rack keeps the cookies level and allows any drips of caramel or chocolate to land on the paper underneath instead of your counter. Spoon a small amount of the cooled caramel onto the center of each cookie and spread it toward the edges with the back of the spoon. Then add a spoonful of melted chocolate on top of the caramel and gently spread it into an even layer. If you prefer a more defined look, use a small offset spatula, which gives a very smooth surface.


For a quicker set, slide the assembled cookies onto a baking sheet and chill them in the fridge or freezer for a short time. The cool temperature helps the caramel and chocolate firm up, which is especially handy if you plan to stack or transport them.

Serving Suggestions
These cookies shine as a dessert platter centerpiece, especially when you arrange them with a few plain shortbread or sugar cookies for contrast. Serve them with hot coffee, a mild black tea, or a glass of cold milk to cut through the sweetness. For a fun party touch, drizzle a little extra melted chocolate over the tops once they have set, or sprinkle a pinch of flaky sea salt on the chocolate layer to highlight the caramel.

Storage Tips
Store the cookies in an airtight container in the fridge for up to 3 days. Chilling keeps the caramel tidy and prevents the chocolate from getting too soft at room temperature. If you prefer a softer bite, let the cookies sit on the counter for 10 to 15 minutes before serving. The assembled cookies do not freeze as cleanly because of the caramel layer, although the plain baked cookie bases freeze very well for up to 2 months; wrap them tightly, thaw at room temperature, then add the caramel and chocolate the day you plan to serve.

More Recipes You Will Love
If you enjoy these Crumbl Copycat Twix Cookies, you might like trying a batch of soft [Crumbl Caramel Pumpkin Cookies] for a seasonal twist with a creamy topping. For a simpler bake, my classic [Brown Sugar Shortbread Cookies] create a lovely base for drizzling with chocolate or caramel. When you need a shareable tray for gatherings, [Salted Caramel Chocolate Chip Bars] and [Millionaire’s Shortbread Squares] both bring layers of cookie, caramel, and chocolate in a sliceable format that travels beautifully.

Crumbl Copycat Twix Cookies
Equipment
- Parchment Paper
- Stand Mixer or Hand Mixer
- Medium microwave safe bowls
- Rubber Spatula
- Large ice cream scoop
- Glass or measuring cup (for flattening)
- Cooling Rack
- Small offset spatula (optional)
Ingredients
For the cookies
- ½ cup unsalted butter softened
- ¼ cup sugar
- ¼ cup brown sugar
- ¼ cup oil
- 1 egg
- 1 teaspoon vanilla
- 2 ¼ cups flour
- 1 teaspoon baking powder
- ½ teaspoon salt
- 1 tablespoon corn starch
- ⅓ cup toffee pieces
For the topping
- 8 ounces caramel candies unwrapped
- ⅓ cup heavy cream
- ½ cup chocolate chips melted
Instructions
- Heat oven to 350°F (175°C) and line baking sheets with parchment.
- In a medium microwave safe bowl, melt caramel candies with heavy cream in 30 second bursts, stirring until smooth; set aside to cool slightly.
- In a mixer bowl, cream softened butter with sugar and brown sugar until light and fluffy.
- Mix in oil, egg, and vanilla until fully combined, scraping the bowl as needed.
- Add flour, corn starch, salt, and baking powder; mix just until no dry streaks remain.
- Fold in toffee pieces.
- Scoop dough onto prepared sheets using a large ice cream scoop, then flatten each mound to about ½ inch thick with a glass or measuring cup.
- Bake 10 to 12 minutes, until edges are just beginning to turn golden and centers look set; cool completely on the sheets.
- Melt chocolate chips in a medium microwave safe bowl in 30 second bursts, stirring until smooth; let cool to room temperature.
- Spoon caramel onto each cooled cookie and spread evenly, then top with melted chocolate and smooth the surface.
- Chill briefly in the fridge or freezer if you want the caramel and chocolate to set more quickly.
Notes
- If you prefer a less sweet cookie, reduce the toffee pieces slightly or sprinkle a tiny pinch of flaky sea salt on top of the chocolate.
- Semi sweet chocolate chips keep the topping balanced, although milk chocolate works well for a milder taste.
- Store assembled cookies in the fridge for up to 3 days; freeze un topped cookie bases for longer storage and add caramel and chocolate later.
Nutrition
A Note on Nutritional Information
Nutritional information for this recipe is provided as a courtesy and is calculated based on available online ingredient information. It is only an approximate value. The accuracy of the nutritional information for any recipe on this site cannot be guaranteed.